

Radha Krishna Mandala art combines patiently designed outline structure, fine lines, and small mandala patterns decorated with a blend of pencil colors to shape traditional artwork.
Radha Krishna Mandala is not as difficult as the actual art looks like. If you are a beginner in making mandala arts it may be challenging or stressful for you in the first month however, Things will get easier with continuous practice. Here’s a step-by-step guide on how to make this beautiful artwork.
Full Video Tutorial on Radha Krishna Mandala Art
Materials required to draw Radha Krishna Mandala Art
Drawing note A4, Mechanical pencil 0.5mm, Black Gel pen (0.5mm), Fine liners, Ball Pen(0.5 mm), Transparent 30 cm scale, Compass, protractor, Markers, Colored Pencils, Eraser
Step 1: Sketching the Basic Outline
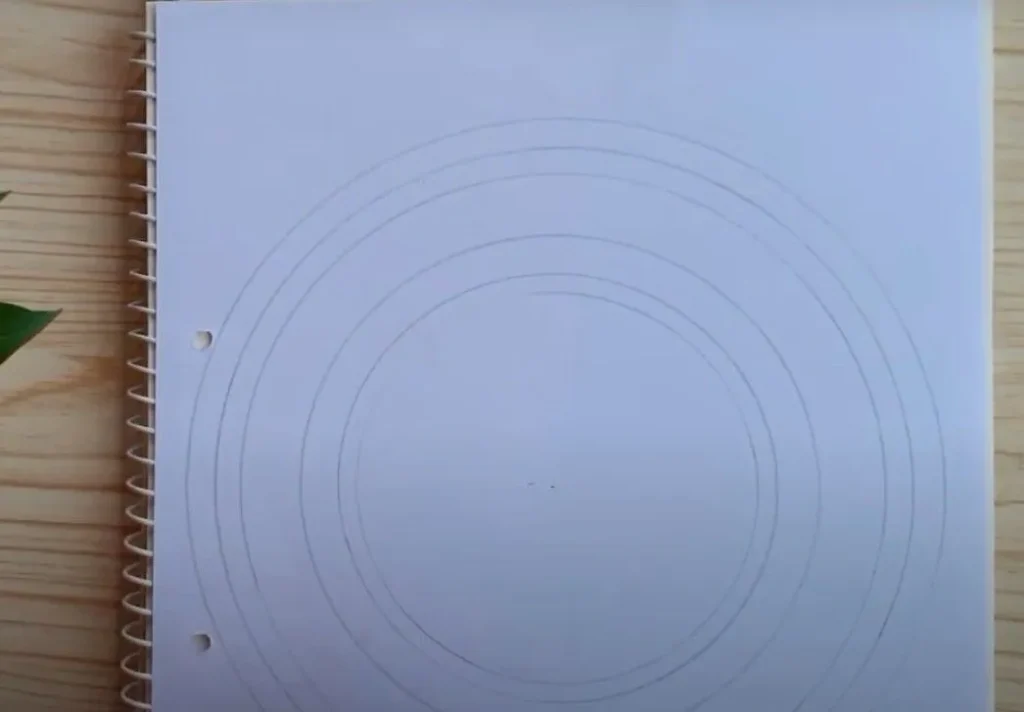
Take an A4-sized paper and begin by drawing a circle at the center of the paper, Start with the base and outline of the Mandala. Draw Multiple concentric circle patterns that will serve as a guide in framing patterns as shown in the video.
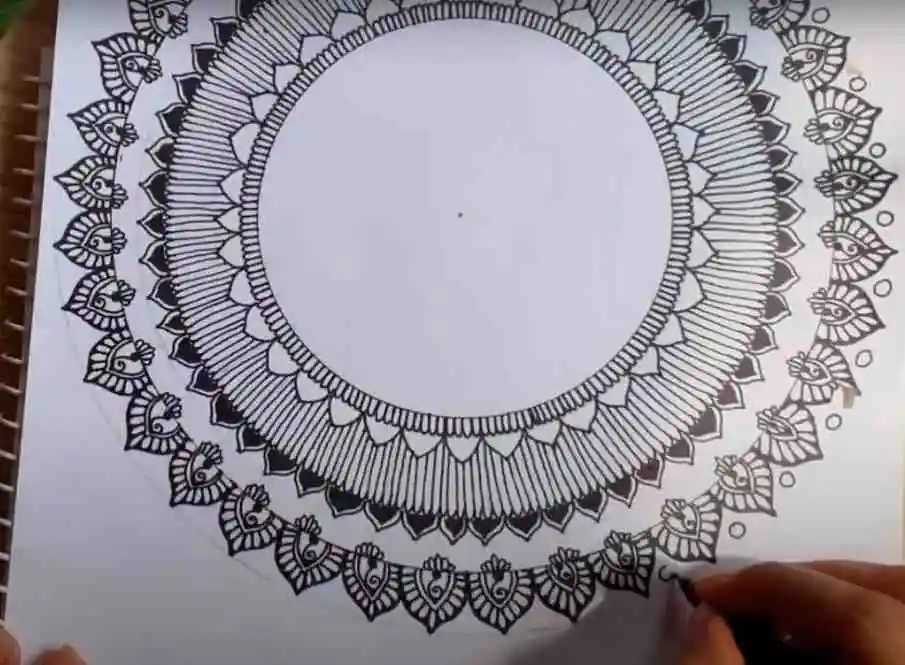
If you are a beginner Add a floral outline and pattern with a pencil. Use multiple petals and leaf patterns repeating manner in the previously outlined concentric circle.
Step 2: Add floral patterns and Mandala patterns design
- Surround the figures with floral patterns and intricate mandala pattern designs. Using repetitive patterns such as petals, and vines helps in creating a balanced design. Sketch the floral patterns from inside to outside direction.
Step 3: Sketching Radha Krishna Mandala Art in the Centre
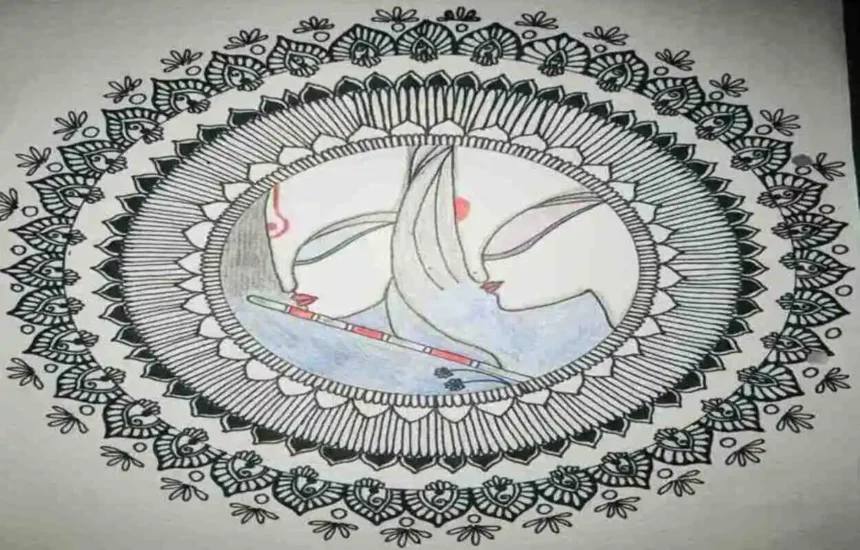
- Sketch the outline profile of Radha Krishna in the center of the circle with the fine liners. The sketched image must not be compacted and visible enough to represent the fine art within it mainly focusing on their facial outlines and Krishna’s flute.
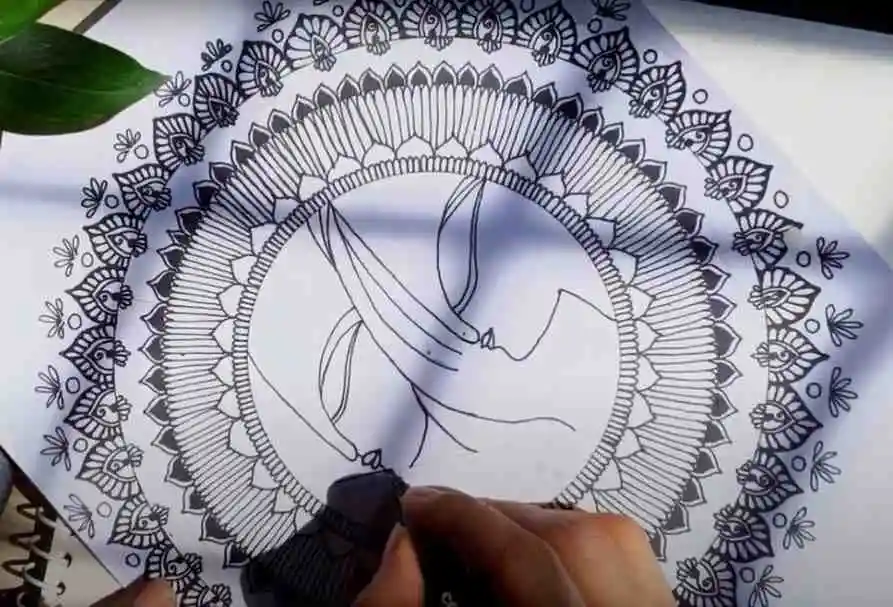
- Keep the lines smooth and flowy to maintain a graceful appearance while adding faces and backgrounds. Add delicate details to Krishna’s flute and the small adornments on their faces. Add small particular details in the sketch such as ornamental details.
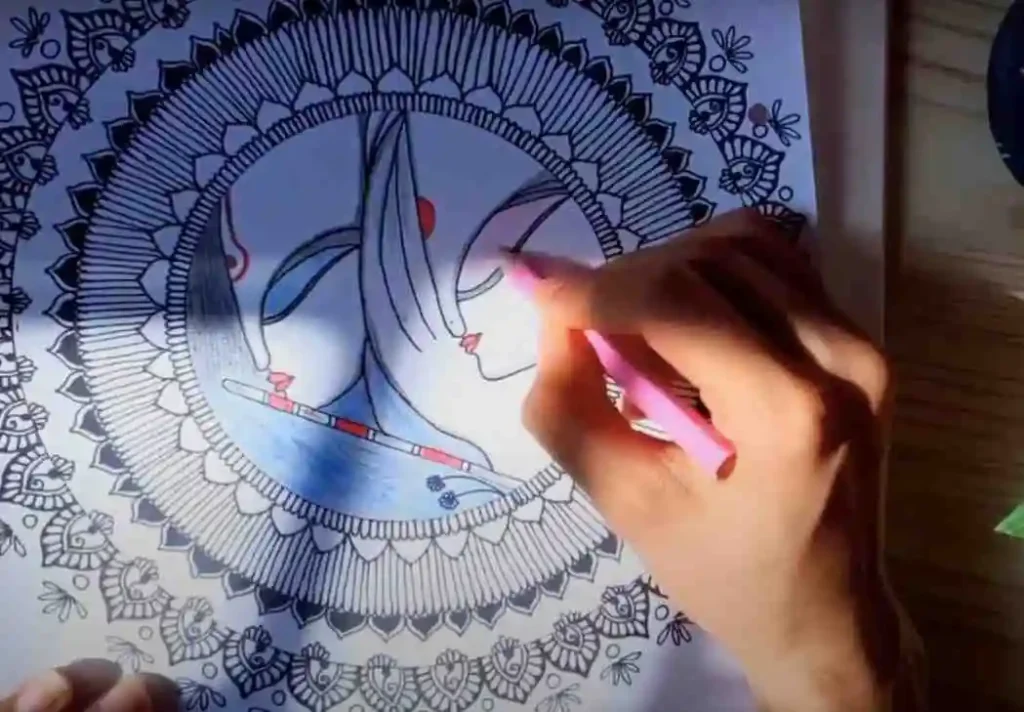
Step 4: Color the Art Work
Color always adds precious decoration to the mandala art to make it look perfect with a blend of pencil color and floral mandala patterns.
Once the outlines are completed, use colored pencils or markers to fill in the mandala and figures. Take care of tradition while adding colors such as Blue color for Krishna and softer /lighter shades for Radha. Also, Highlight the floral patterns with the contrasting colors as shown in the video.
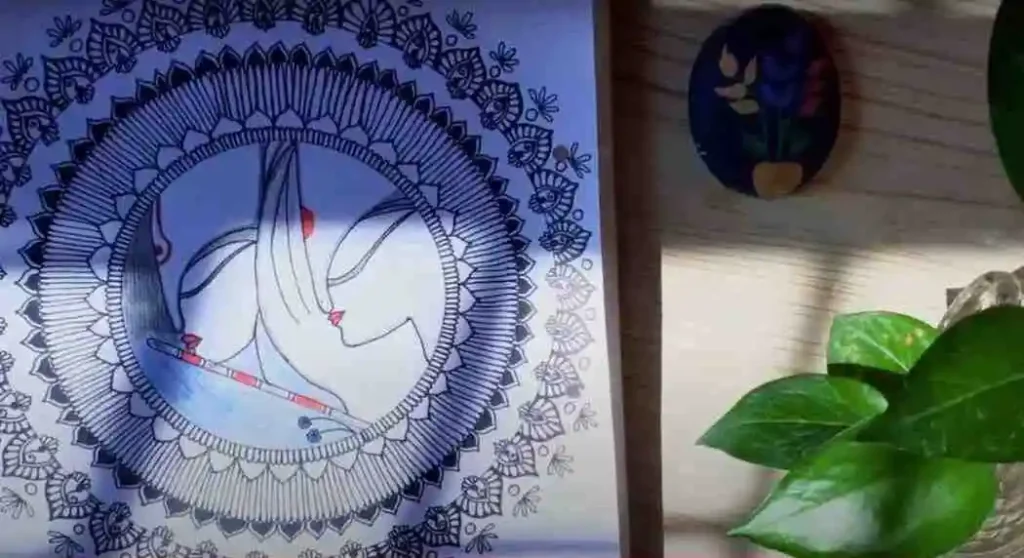
Step 5: Give a finishing touch
- After a touch-up with the colors Erase any remaining pencils outline sketch and marks. After completing the Radha Krishna Mandala art add lighter colors in the space remaining in the paper background near the footer area and that makes it look more attractive.
After you fulfilled the above step-by-step process you will be ready with a perfect blend of cultural symbolism with artistic expression, creating a captivating Radha Krishna Mandala that represents both divine love and meditative art.
Comment with your Radha Krishna Mandala art in the comment section the best Mandala art will be featured in the article above..
Also Read: IND VS SL Match Details and Playing 11 Predictions